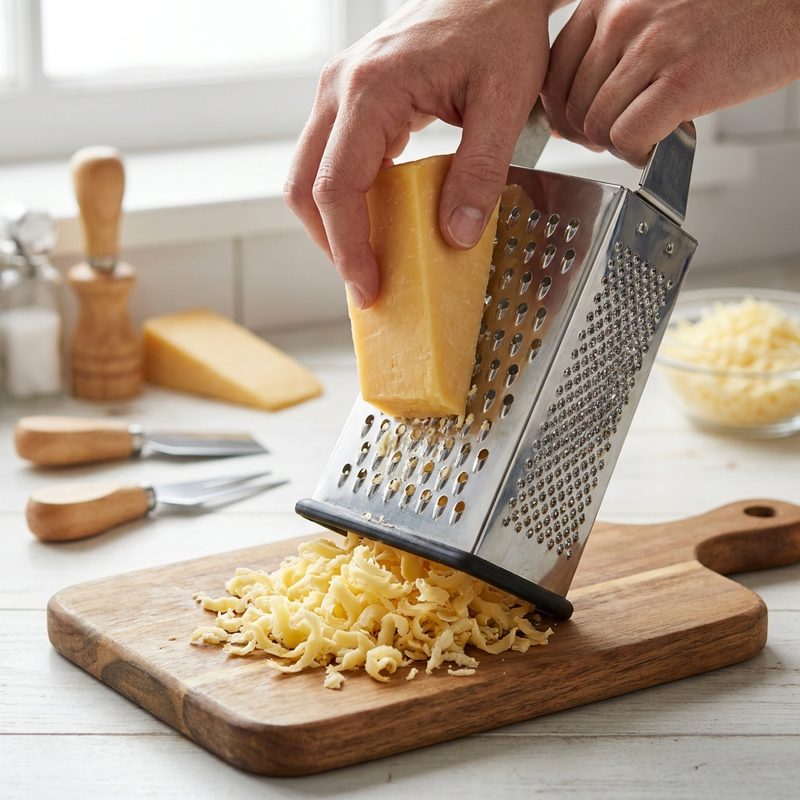
Step 1: Chill the Cheese
Cheddar cheese, especially sharp varieties, can become soft and gummy at room temperature. To ensure clean shreds, place your block of cheddar in the freezer for exactly 15 to 20 minutes—no longer, or the cheese may become brittle and crumble. The ideal internal temperature is around 40°F (4°C). A chilled block should feel firm to the touch but not rock-hard; if you press it, your finger should leave only a slight indent. For a 1-pound block, 15 minutes is sufficient; for a 2-pound block, extend to 20 minutes. If the cheese is too cold, it will shatter into jagged shards rather than shredding cleanly. To test, take a small corner and grate it—it should produce long, separate strands without sticking to the grater. If it smears or leaves a residue, return it to the freezer for 5 more minutes. Avoid chilling pre-sliced or crumbled cheese, as it will dry out and lose moisture.
Step 2: Prepare Your Equipment
Choose your tool based on the quantity needed. For small amounts (under 1 cup), a traditional box grater is best. For large batches (2 cups or more), a food processor with a grating attachment is most efficient. Lightly coat the grating surface with a small amount of neutral oil or cooking spray—use about 1 teaspoon of canola or grapeseed oil, applied with a paper towel, to prevent the cheese from sticking to the metal. For a box grater, spray the entire side you plan to use, including the edges. For a food processor, spray the grating disc and the inside of the lid. If using a box grater, place it on a damp paper towel on the cutting board to prevent slipping. For a food processor, ensure the bowl is locked securely and the grating disc is oriented with the flat side up. If you skip the oil, the cheese may weld to the metal, forcing you to scrape it off with a spatula and losing shreds.
Step 3: The Box Grater Method
Hold the box grater firmly by the handle on a stable cutting board. Hold the block of cheese and use long, downward strokes against the side with the large holes—these are typically 1/4-inch diameter. Use steady, even pressure, applying about 2 to 3 pounds of force. Each stroke should be 4 to 6 inches long, from the top of the grater to the bottom. You should hear a clean, rhythmic scraping sound; if you hear a squelch, the cheese is too warm or the grater is clogged. As the block shrinks, rotate it to maintain a flat surface—this prevents uneven shreds and keeps your fingers safe. When the block is down to a 2-inch stub, switch to the fine holes (1/8-inch) for the last bit, or use a hand guard. Stop when you have 1/2 inch left to avoid grating your knuckles. If the cheese clogs the holes, scrape the back of the grater with a butter knife and reapply oil. The shreds should be 1 to 2 inches long, fluffy, and separate easily. If they form a mat, the cheese was not chilled enough.
Step 4: The Food Processor Method
If using a food processor, cut the chilled block of cheddar into chunks that fit into the feed tube—each chunk should be about 1 inch wide by 3 inches long. Attach the grating disc to the top of the bowl, ensuring it clicks into place. Turn the machine on to high speed (usually setting 2 or 3) and use the pusher to gently guide the cheese through the tube at a steady rate—about one chunk every 2 seconds. Do not force it; let the disc do the work. You should hear a consistent whirring sound; if the motor strains, the cheese is too cold or the chunks are too large. The shreds will fall into the bowl in a uniform pile, each about 1/4 inch wide and 1 to 2 inches long. Process no more than 1 pound at a time; overloading will cause uneven shredding and clumping. When finished, tap the bowl to settle the shreds, then lift out the disc—scrape any cheese stuck to the underside with a spatula. If the shreds are mushy or paste-like, the cheese was not chilled enough or the disc is dull. For a finer shred, use the small grating disc (1/8-inch holes) and cut chunks smaller, about 1/2 inch wide.
Step 5: Hand-Shredding with a Knife
If you don't have a grater, you can use a sharp chef's knife (8-inch blade recommended). First, slice the chilled cheese into very thin planks, each about 1/8 inch thick. Use a rocking motion with the knife, keeping the tip on the board. Stack 3 to 4 planks, aligning the edges, then slice those planks into thin matchsticks, again 1/8 inch wide. The resulting shreds should be 1 to 2 inches long and about 1/8 inch thick. While more time-consuming—about 5 minutes per cup—this produces 'rustic' shreds that work well in salads or on top of chili. They will melt more slowly than grated cheese, so add them at the end of cooking. If the cheese crumbles during slicing, it is too cold; let it sit at room temperature for 5 minutes. If it smears, it is too warm; return it to the freezer for 10 minutes. For a finer texture, slice the matchsticks crosswise into small cubes, about 1/8 inch on each side. This method is ideal for small quantities (under 1/2 cup) and when you want to avoid washing a grater.
Key Takeaways
- ✓ <html><ul><li>Always grate your own cheese to avoid cellulose and potato starch found in pre-bagged versions.</li><li>Use the smaller holes on a box grater for garnishing soups or tacos, and the larger holes for melting into sauces.</li><li>If the cheese starts to get too soft while you are working, put it back in the freezer for 5 minutes.</li><li>Clean your grater immediately after use by running it under cold water to prevent the cheese from hardening in the holes.</li></ul></html>