The Poke Test: The Gold Standard
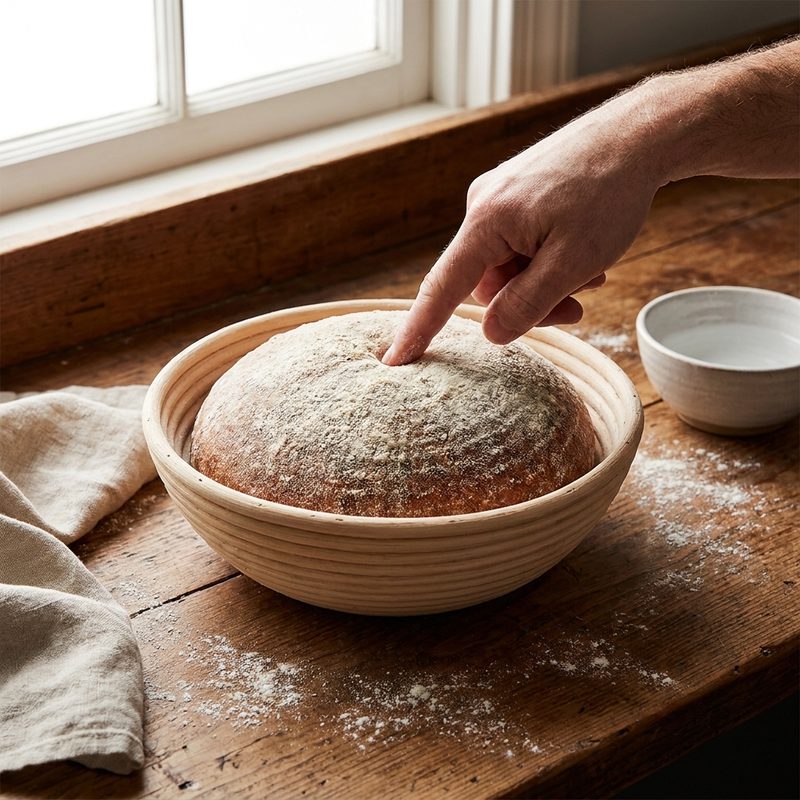
The most reliable way to check proofing is the 'poke test.' Gently press your finger about half an inch into the surface of the dough. If the indentation springs back immediately and completely, it is under-proofed. If the indentation stays exactly where it is and the dough feels fragile or deflates, it is over-proofed. The 'sweet spot' is when the dough springs back slowly and leaves a slight, visible dimple.
Visual Cues and Size Changes
While many recipes suggest waiting for the dough to 'double in size,' this is an approximation. Look for dough that appears pillowy, soft, and full of air. For shaped loaves in tins, the dough should generally reach about one inch above the rim of the pan. If you see large, translucent bubbles on the surface, the dough is likely reaching the limit of its strength and should be baked immediately.
Troubleshooting Under-Proofed Dough
Under-proofed dough is characterized by too much internal tension. If baked too early, the bread often suffers from 'oven spring' that is too violent, leading to side-splitting or a dense bottom layer. To fix this, simply provide more time. If your kitchen is cold, move the dough to a warmer spot like the inside of an oven (turned off) with the light on to gently encourage yeast activity.
Troubleshooting Over-Proofed Dough
Over-proofing occurs when the yeast has consumed most of its food and the gluten structure begins to weaken under the weight of the CO2. This often results in a loaf that collapses in the oven. If you realize your dough is over-proofed before baking, do not despair. You can gently degas the dough, reshape it, and let it proof again. However, this second proof will likely be faster and the final flavor may be more acidic due to prolonged fermentation.
Key Takeaways
- ✓ <html><ul><li>Temperature is the biggest variable; dough proofs much faster at 80°F than at 65°F.</li><li>Use a clear, straight-sided container for the first rise to track volume increase accurately.</li><li>Always flour your finger before performing the poke test to prevent sticking and false readings.</li><li>Humidity matters—keep your dough covered with a damp cloth or plastic wrap to prevent a dry skin from forming.</li></ul></html>