Step 1: Choosing Your Fat
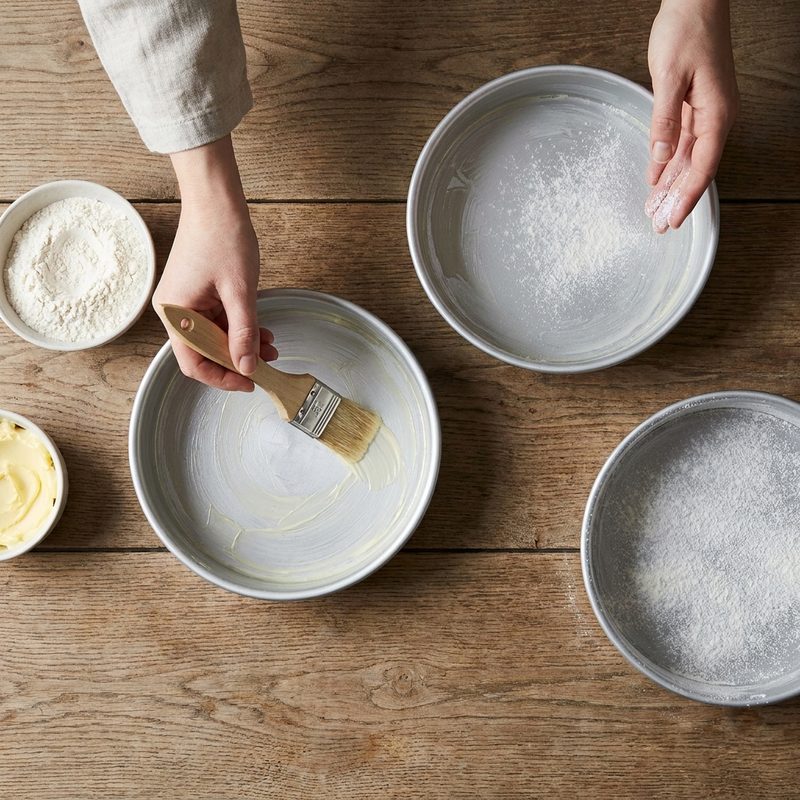
Start with room temperature softened butter or vegetable shortening. Avoid using melted butter, as it tends to pool in the corners and can be absorbed by the batter rather than creating a protective barrier. Shortening is often preferred by professionals because it has a higher melting point and creates a more stable film.
Step 2: Applying the Coating
Using a pastry brush or a piece of folded parchment paper, apply a thin, even layer of fat to the bottom and all sides of the pan. Pay special attention to the 'seam' where the bottom meets the sides, as this is the most common site for sticking. Ensure there are no large clumps of fat, which can fry the edges of the cake.
Step 3: Adding the Flour
Add about a tablespoon of all-purpose flour to the pan. Tilt and rotate the pan until the flour has coated every inch of the greased surface. Once fully coated, turn the pan upside down over a sink or trash can and give it a firm tap to remove any excess. A thick layer of flour will result in a pasty, white crust on your finished cake.
Step 4: Troubleshooting Common Issues
If your cake consistently sticks despite greasing, check your pan's condition. Scratches in non-stick coatings provide 'teeth' for the batter to grab onto. Furthermore, if your cake is high in sugar, it may caramelize against the pan; in these cases, always line the bottom with a circle of parchment paper in addition to greasing the sides.
Step 5: How to Fix a Stuck Cake
If the cake is stuck, do not try to pry it out immediately. Run a thin, flexible offset spatula around the edges. If that fails, place the bottom of the pan on a warm, damp towel for five minutes to help loosen the fats, or return it to a warm oven for 60 seconds to soften the exterior sugars before attempting to flip it again.
Key Takeaways
- ✓ <html><ul><li>For chocolate cakes, use cocoa powder instead of flour to avoid a white, dusty residue on the dark cake exterior.</li><li>Always use softened butter, never melted, to ensure the flour has a structural base to adhere to.</li><li>For intricate Bundt pans, use a specialized baking spray that contains flour, or 'baking goop' (a homemade mix of equal parts oil, shortening, and flour).</li><li>If a cake breaks upon release, use a bit of frosting as 'glue' to reattach the piece; once frosted, the seam will be invisible.</li></ul></html>